

Vector Tutorial: Apple with Gradient Mesh
| Illustrator Art Tutorial: Beautiful Eye »

Illustrator Tutorial: Create a Gradient Mesh
In this Adobe Illustrator tutorial, we learn you how to use a simple gradient mesh to create a semi realistic object. Since our objective is to introduce the gradient mesh tool to beginning illustrators and vector artists, we decided to chose a simple object, an apple.
Tutorial Details
- Program: Adobe Illustrator
- Version: CS
- Difficulty: Beginner/Intermediate
- Estimated Completion Time: 45 - 60 minutes
Illustrator Tutorial: How To Create a Gradient Mesh
Step 1
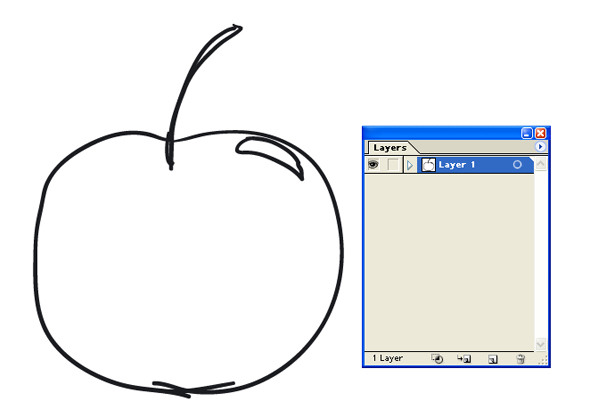
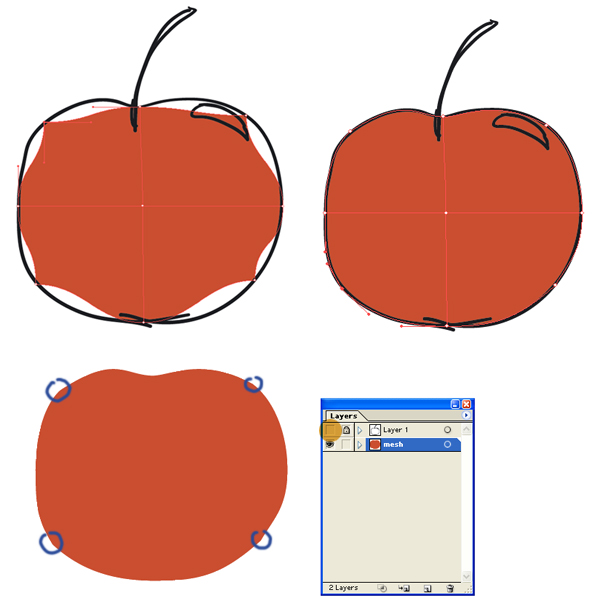
Draw the basic shape of an apple in your first layer. It doesn't need to be a perfect shape, just a rough sketch will do the trick. You can use the Pencil or Brush tool for this.
Step 2
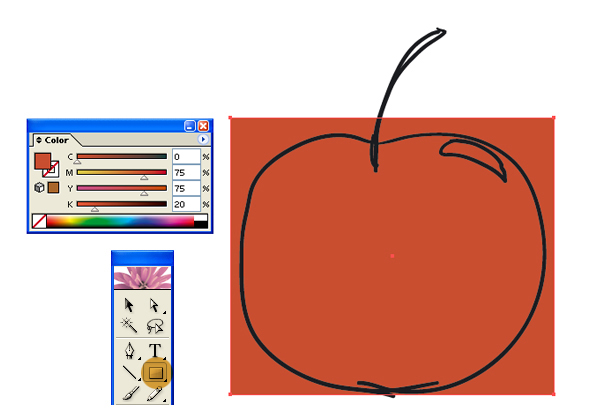
Create a new layer on top of the sketch layer, and name it the "Mesh" layer". In the layer palette, drag the "Mesh Layer" under layer 1 which is containing the rough sketch. Lock layer 1.

Step 3
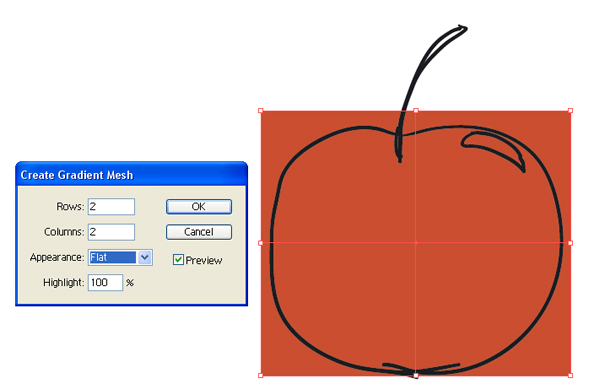
Now we continue the work in the Mesh layer. Create an orange rectangular shape that is bigger than the apple (keep the layer 1 visible as we will use the sketch within as a guide). Once you have created the rectangle, select it and apply Object > Create Gradient Mesh. Set the number of rows and columns to 2 in the dialog box.

Step 4
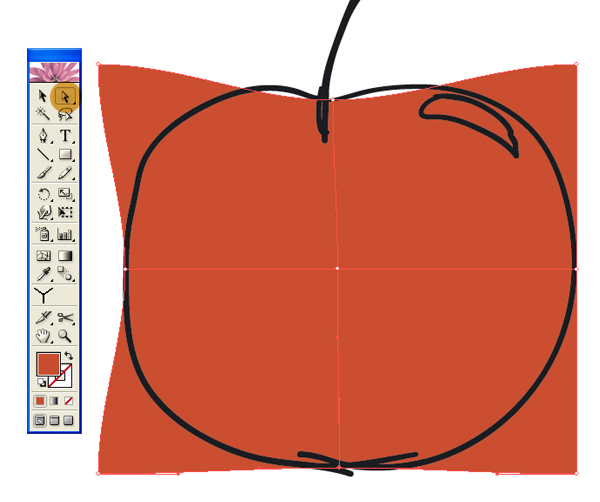
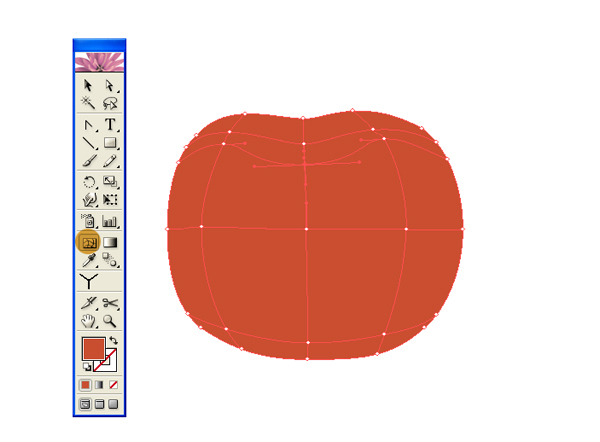
Now use the Direct Selection tool (white arrow) or the Mesh Tool (U) to make the rectangle fit into the apple shape.
Step 5
When you obtained the desired shape, you can divide the mesh into some parts for the purpose of basic rendering. Use the Mesh Tool (U) to do so.
Step 6
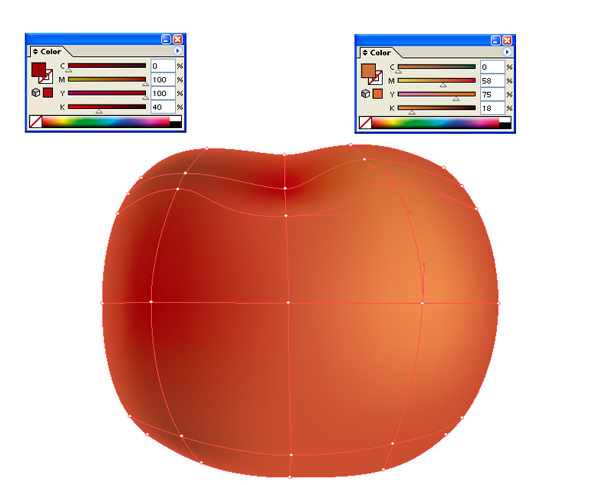
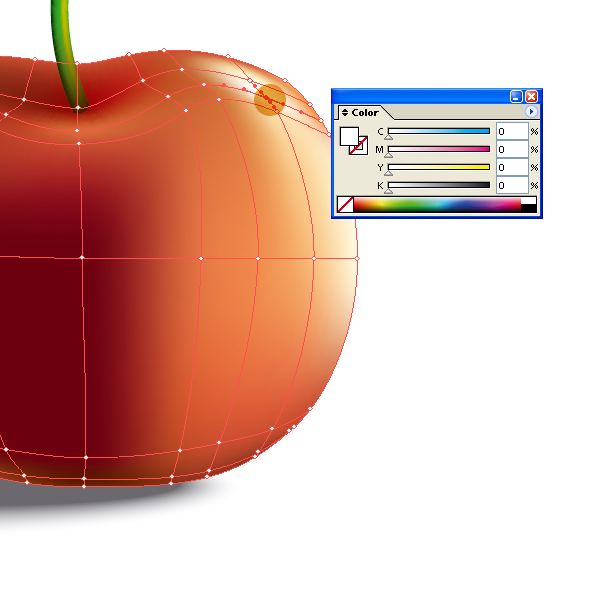
After you have divided the shape in separate parts, color up the anchor points with lighter orange to have the highlight effect and darker orange to obtain a nice shading effect. It's important to decide where the light sources are coming from upfront. Since this is a basic rendering, there is no need to work very detailed as we will do the detailed parts in the next steps.
Just take your time to decide where the light sources are coming from. This is a very important step as it will be hard to change the light treatment once your vector artwork has a lot of detail.
Step 7
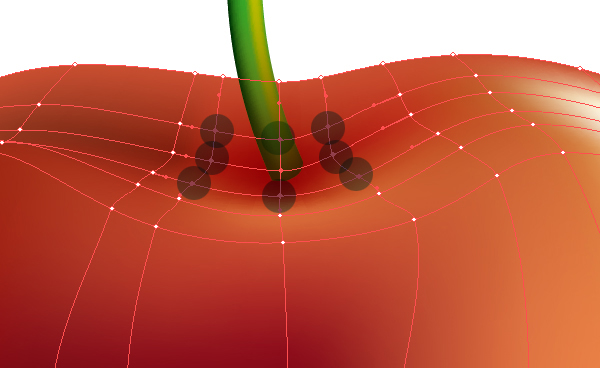
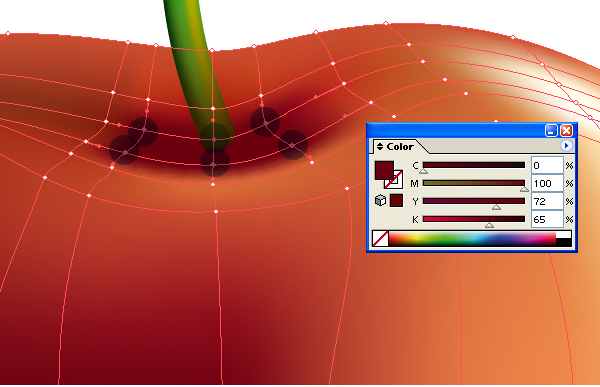
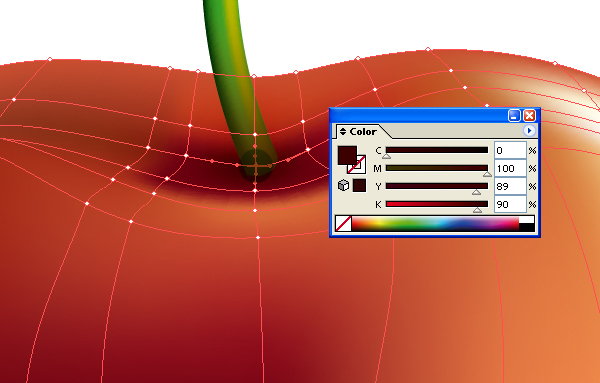
When you are satisfied with the basic rendering, let's add more light and shade detail by adding anchor points to the place where you think they should belong. Apply lighter and darker color to these spots. You can of course use your intuition to do so, but photo references will help you a lot.
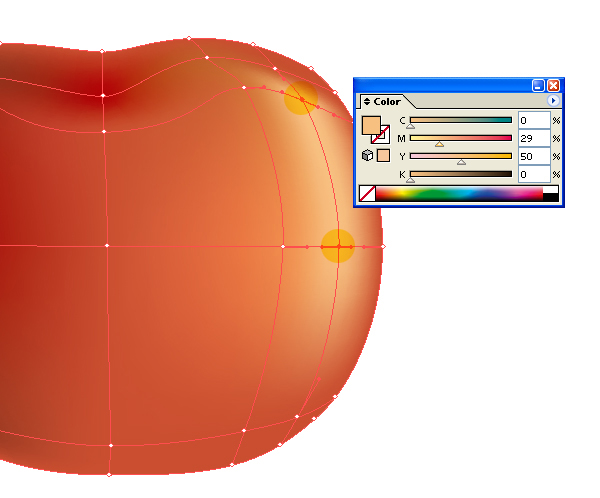
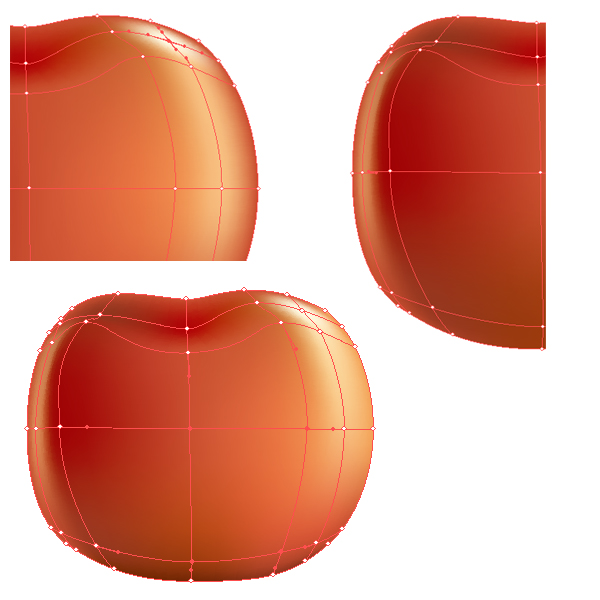
This is the result we have so far. The vector apple starts to get shape, but we're not finished yet. After this comes the finetuning part, to make the apple look as a real apple.

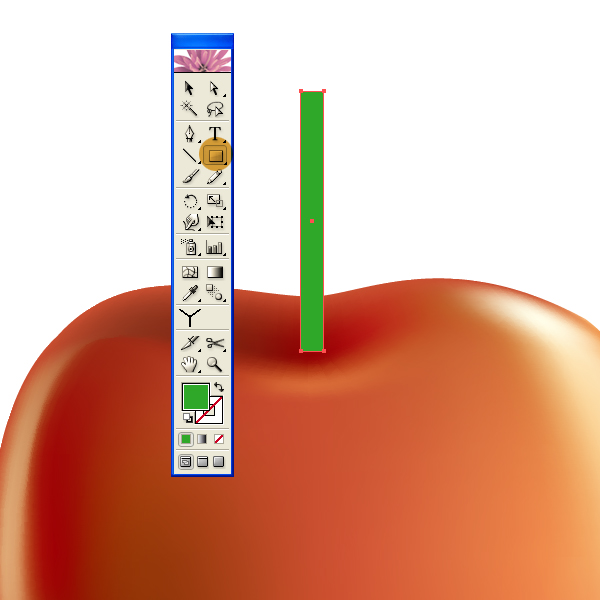
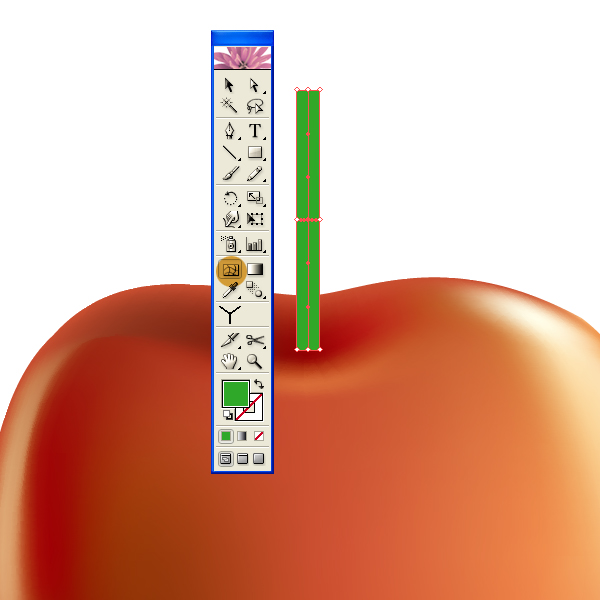
Step 8
Create a green rectangular to shape the apple stem. Use the gradient mesh as we have explained in step 4.
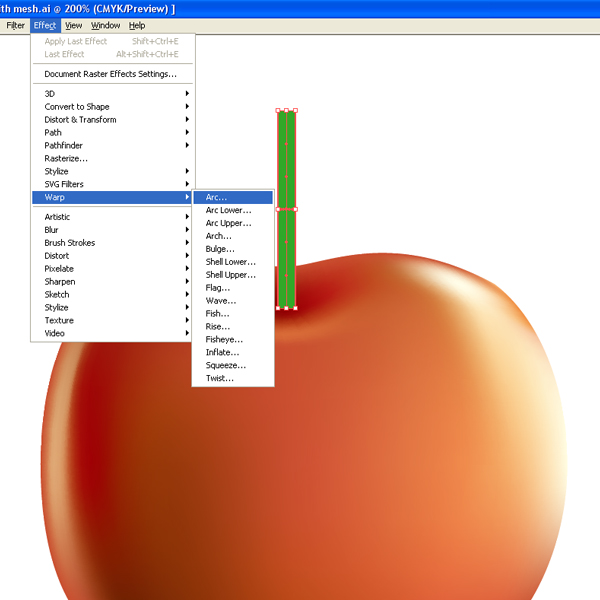
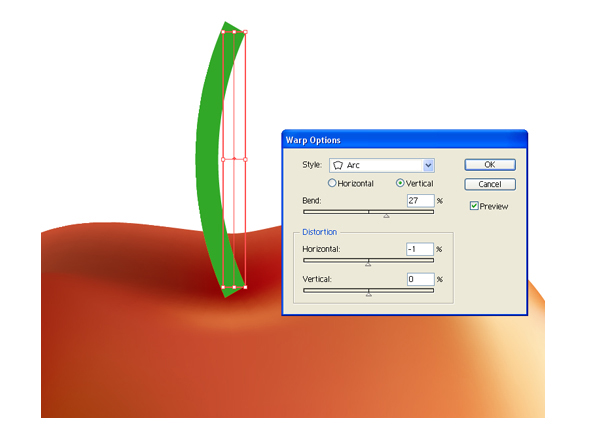
Step 9
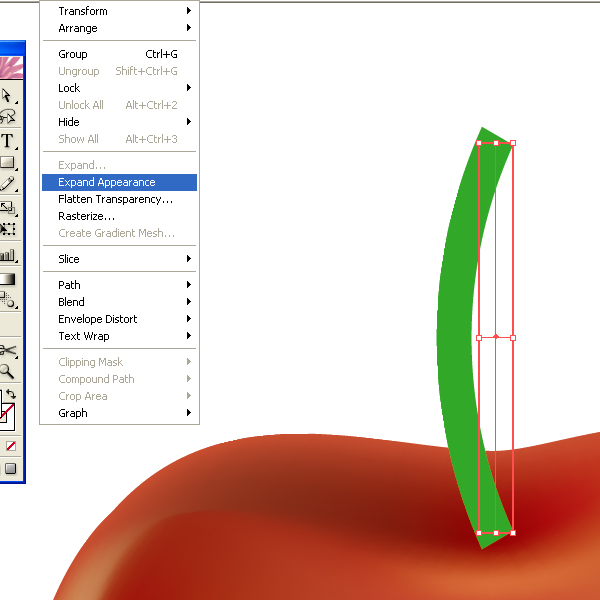
Use the Effect > Warp > Arc to bend the apple stem and expand the result once you got the look and feel you want.
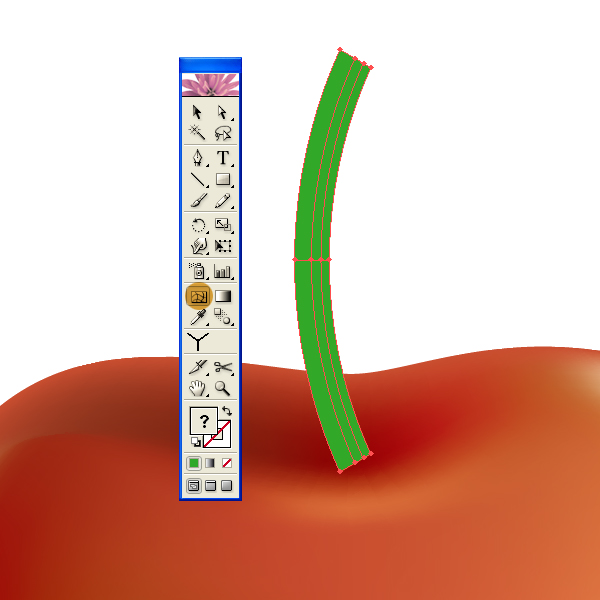
Step 10
Repeat step 6 & 7 to the vector apple stem.
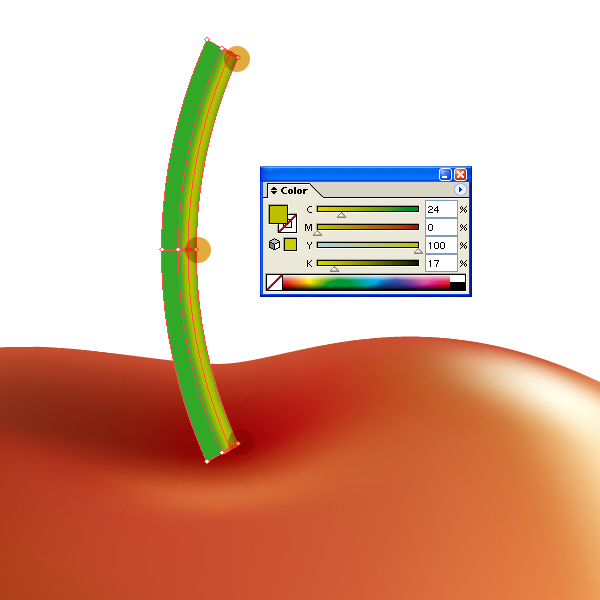
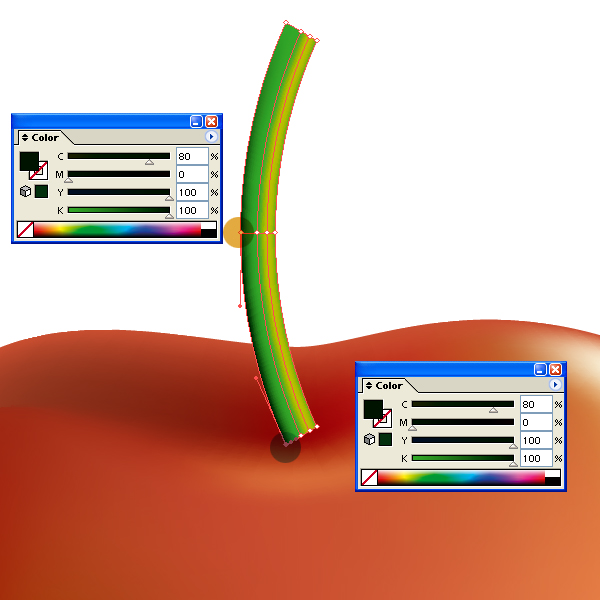
Step 11
Change/adjust the lights/shades to make the apple stem as you want it to look. Here we have chosen to darken the bottom of the stem.
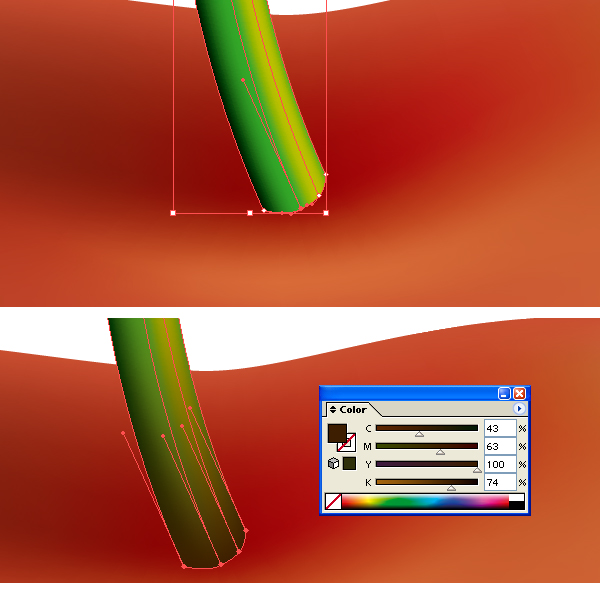
Step 12
This is the step where you need to take a closer look at the object. In case something is not good, make the needed color adjustment.
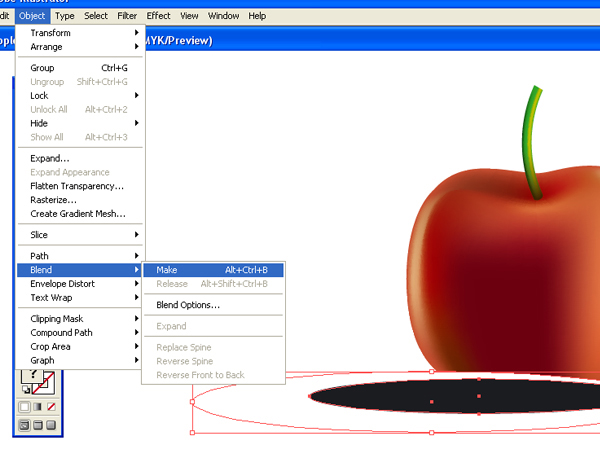
Step 13
In this step we will create the drop shadow. Make two ellipses as shown below, one is filled with black color and the other with white. Select both and apply Object > Blend > and put it below the apple.
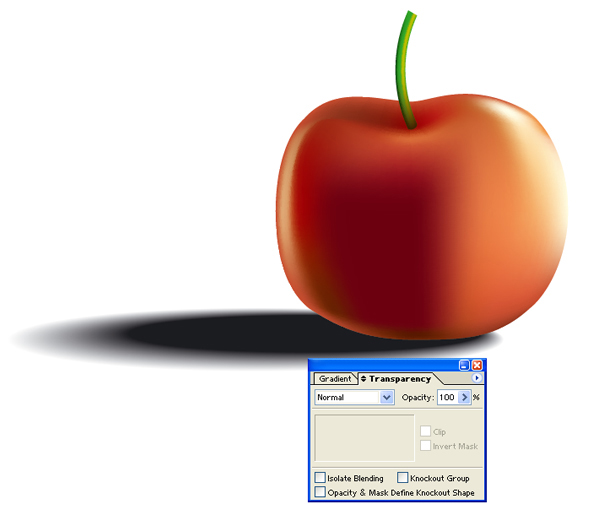
Step 14
Reduce the opacity of the shadow in the Transparency palette.
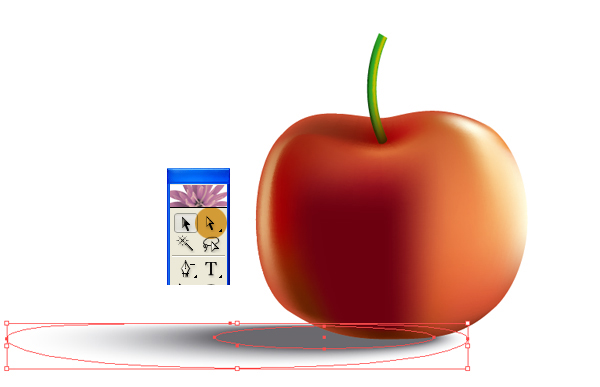
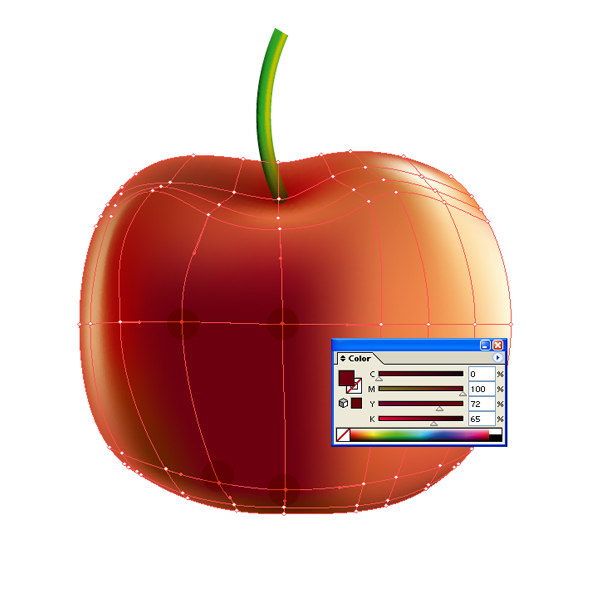
Step 15
Observe the apple once again and add the needed highlights/shading to it.
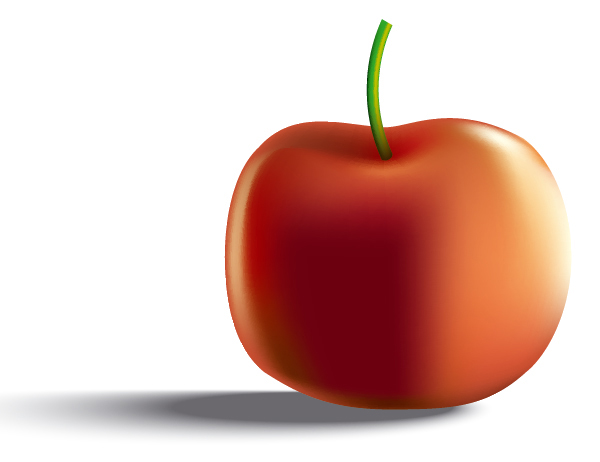
Step 16
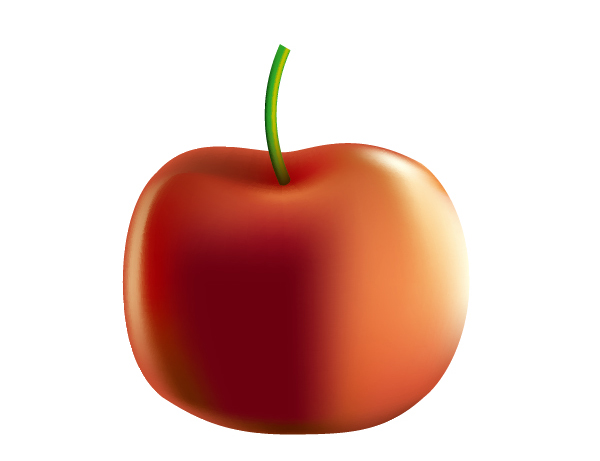
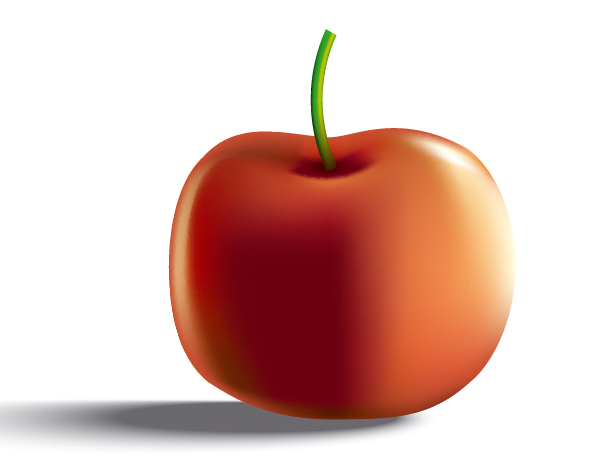
Here you can see the final result. This basic vector illustration has been done without tracing a picture. Have fun creating your own version!

Created by Peyi for Vector NET ©2009
Comments are closed.
Comments have been close for this post.
Comments
1 Darren Angus says...
Posted at 4:05 p.m. on February 18, 2010
2 tabish mohd khan says...
Posted at 11:03 a.m. on April 24, 2010