

Illustrator Tutorial - How to Create a Vector Tree
« Hello Freaks & Other Graphic Art Outlaws | Andrew Bannecker - Simple, True and Tender »

In this vector tutorial I will show you one of quick and easy way to create a tree with very nice highlight and shade.
Tutorial Details
- Program: Adobe Illustrator
- Version: CS
- Difficulty: Easy/ intermediate
- Estimated Completion Time: 60 - 90 minutes
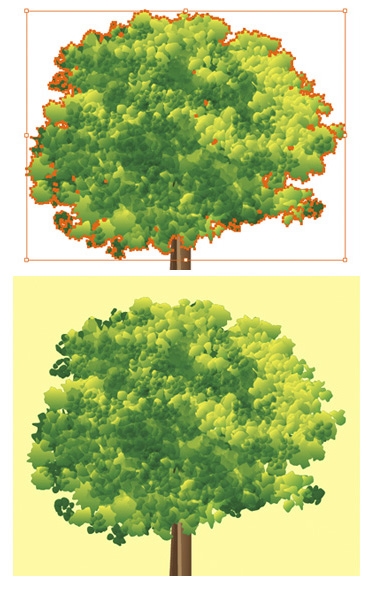
Step 1
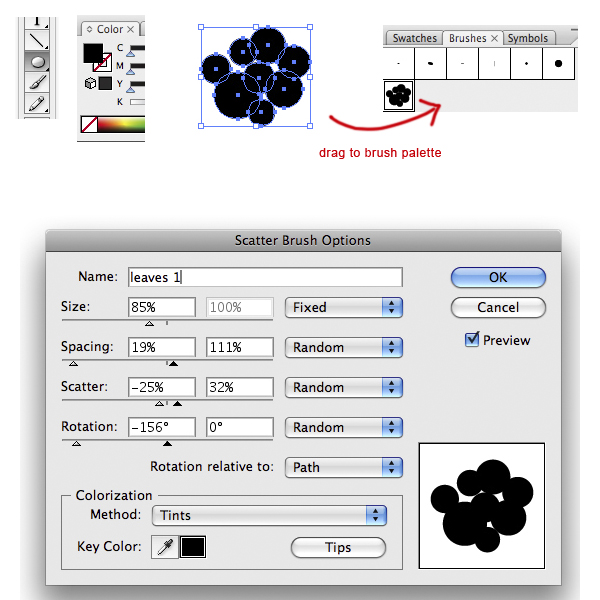
Make some black ellipses varied in size and position them as closer as what shown below, no need to exactly the same cause we're going to use it as a custom brush so feel free to experiment with the composition. When it's done group them (Ctrl + G) and drag it into Brush palette. The New Brush option will pop up after, choose Scatter brush and set the setting as shown below.
Step 2
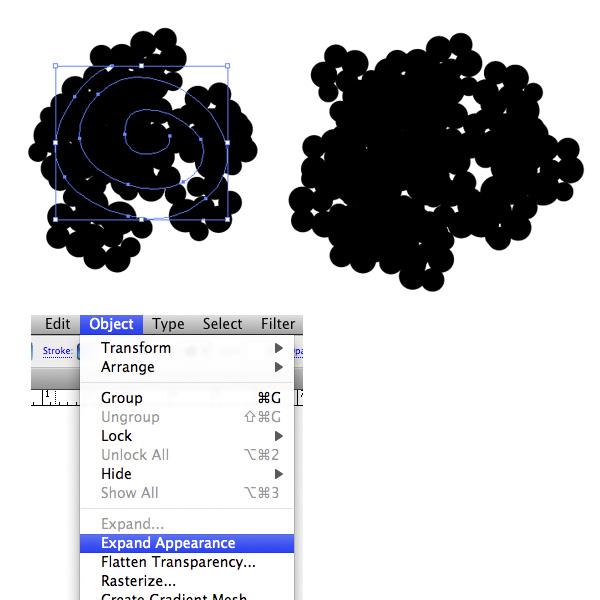
Now we have the custom brush, use it with Brush tool (B) to draw basic shape of the tree. When you have satisfied with the basic shape look, expand it (Object > Appearance), ungroup the result (Ctrl + Shift + G).

Step 3
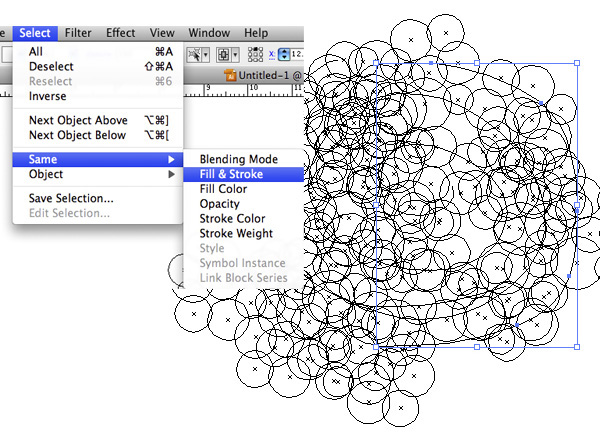
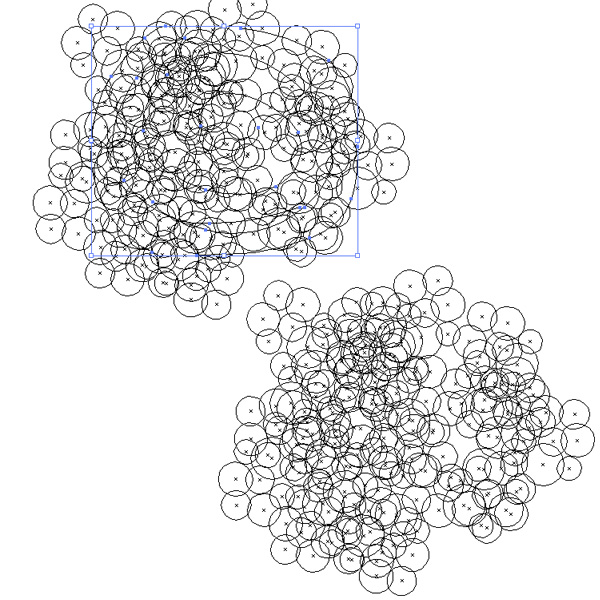
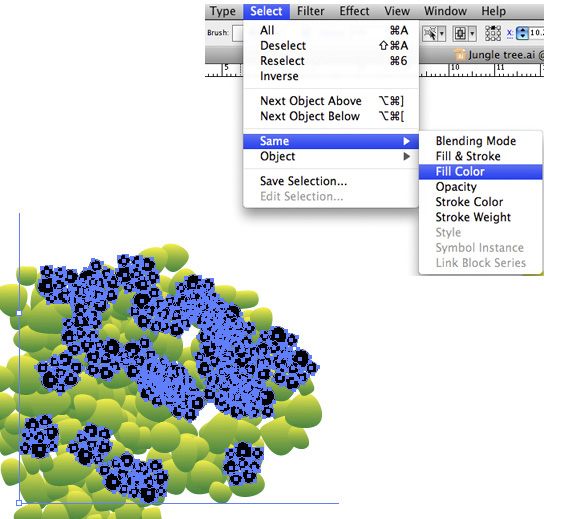
When a brush expanded, it will still have the original path within; the path has neither fill nor stroke. Switch to Outline mode (Ctrl + Y) so we can see the original path, select one of it and go to Select > Same > Fill and Stroke to select them all, and remove them from the document (delete).
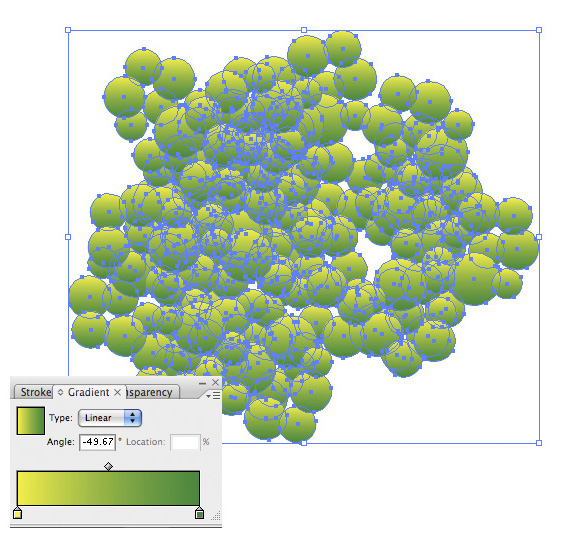
Step 4
Now fill all the expanded objects (ellipse) with light green to dark green gradient as shown below, feel free to use other color combination. Drag the gradient to your new swatch because we're going to use it again later.
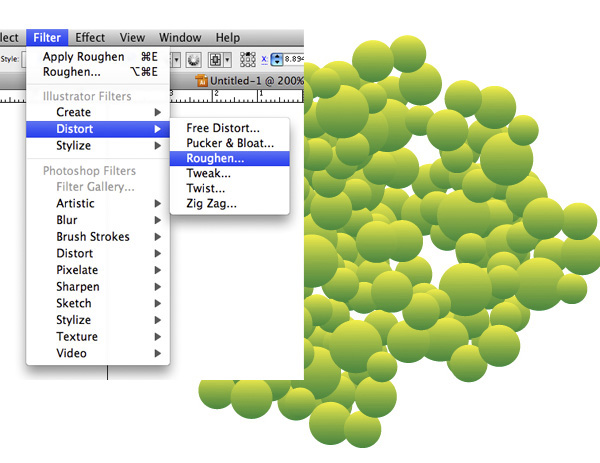
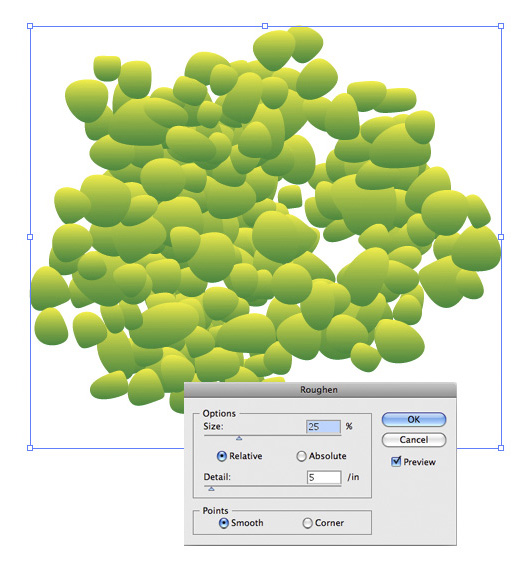
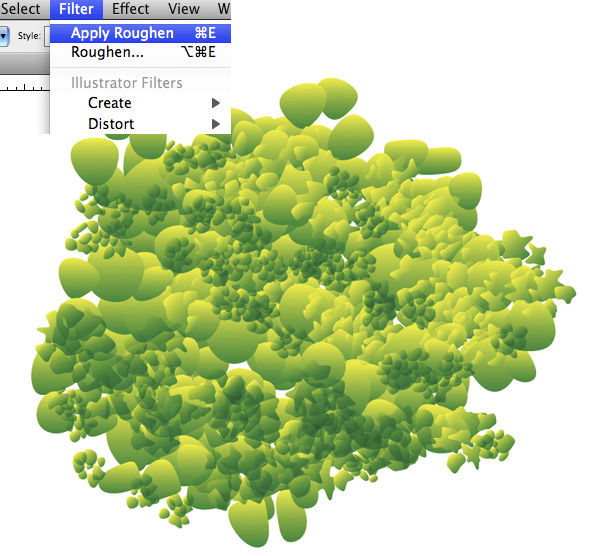
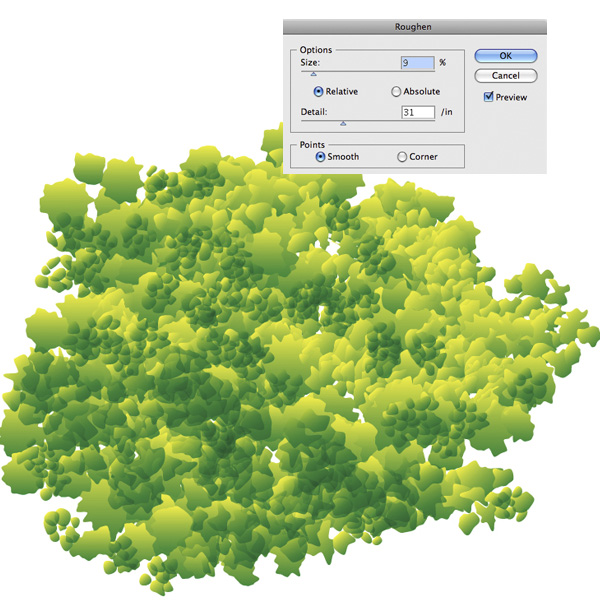
Step 5
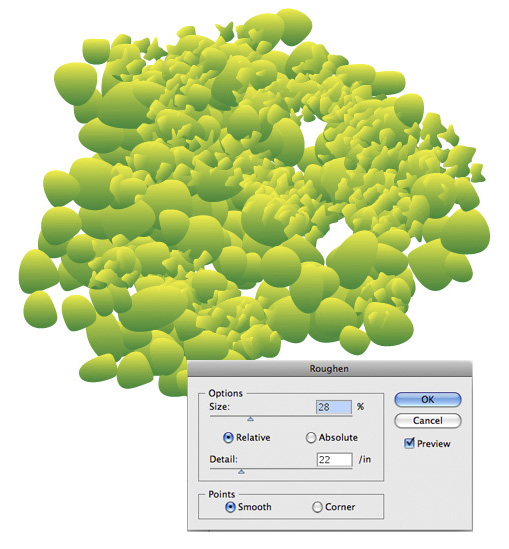
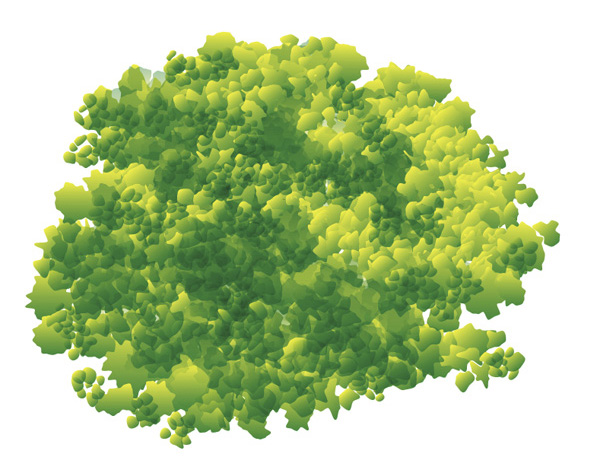
Next step is making them look natural. Select them all and apply Filter > Distort > Roughen, play with the setting until you have the result you like.
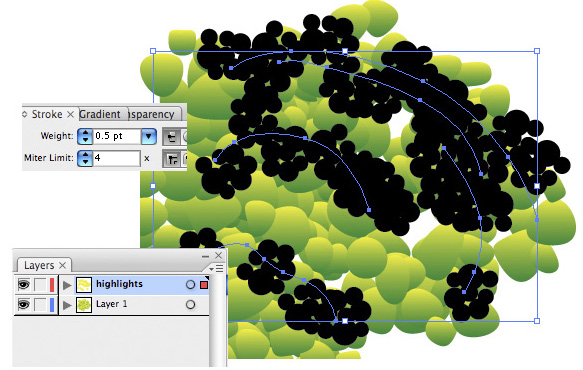
Step 6
Now let's make the highlights. Brush on the place where you think the highlight should belong to, use lighter weight of stroke. When it's done repeat step 3; expand the brushes and remove the original path.
Step 7
Select one of the black ellipse and go to Select > Same > Fill color, fill them with the same gradient and set the blending mode to Lighten in Transparency palette.

Step 8
Roughen the highlights.
Step 9
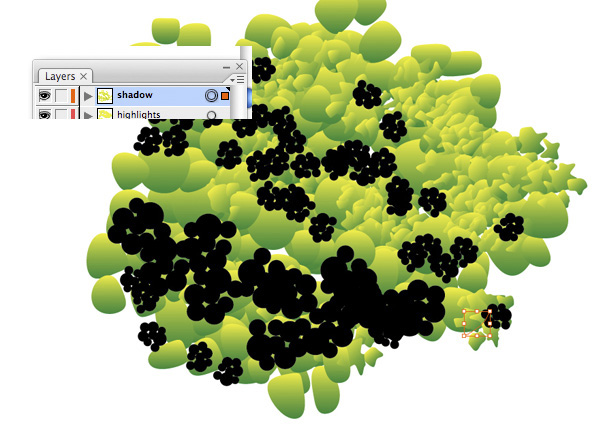
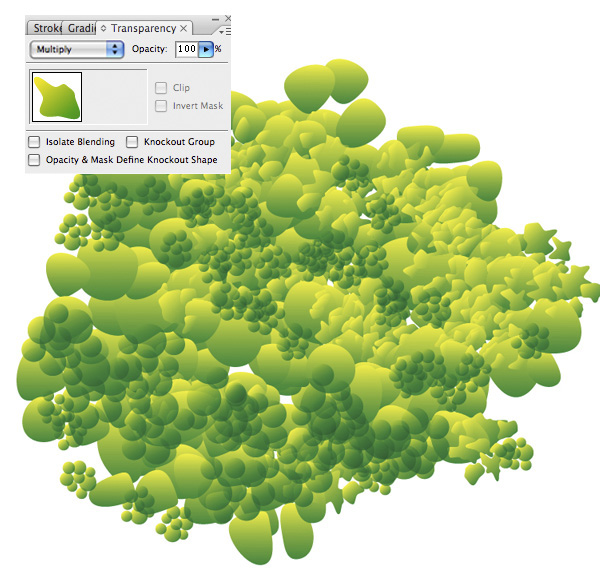
Do the same technique for shading the tree, but this time use Multiply mode to have dark/shadow effect.
Step 10
Add needed highlight and shading.
Step 11
Next is creating the wood. Make a tall brown rectangular as shown below, use Knife tool to cut it into some pieces. Fill each piece with different brown from another.
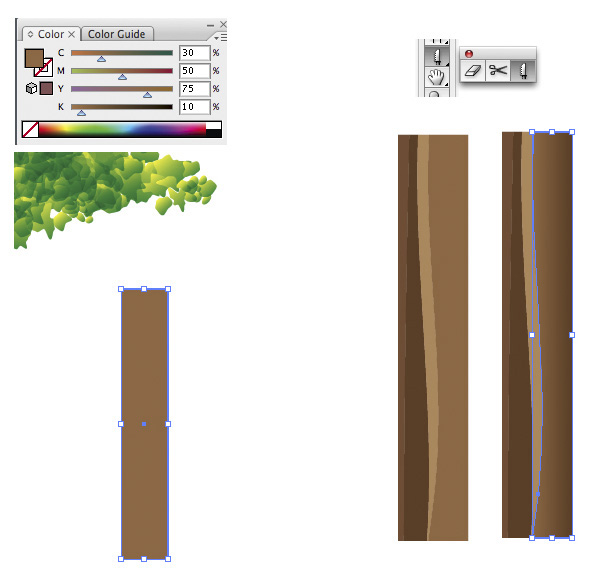
Step 12
Group (Ctrl + G) the pieces and position as shown below. Make some needed adjustments to it.
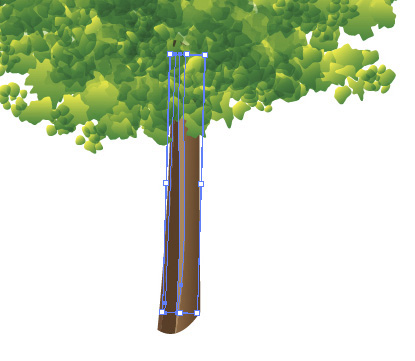
Step 13
Now add a background to it. Make a big square and ellipse in new layer under the tree layer as shown below, select them both and use Divide button in Pathfinder palette. Ungroup the result and color each object.
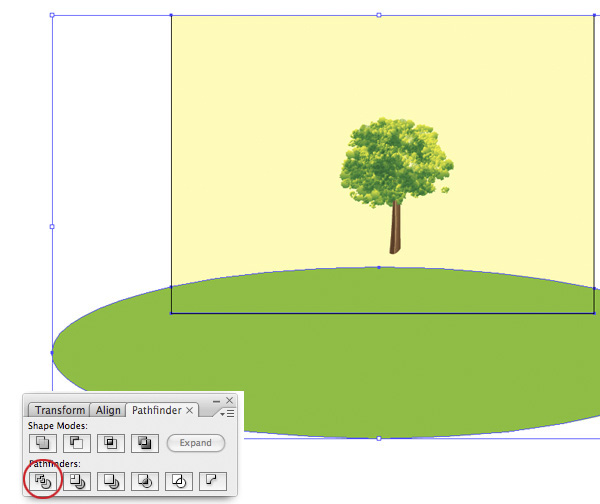

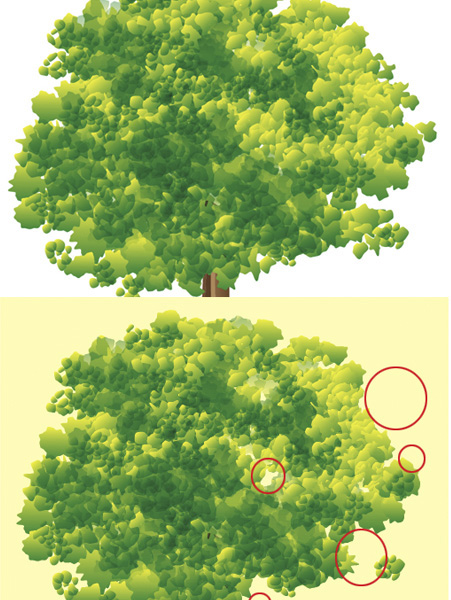
Step 14
Now take a closer look at the leaves, the interesting part is that when we add color to the background some objects/leaves are disappear. How can that happen? It seems that the Overlay mode of the highlights does not work with the background color (see red circle marks). Sure we can just leave it that way, but if you want to experiment with background you have to put the missing objects back to the game, otherwise it will affect the color of other object below it.
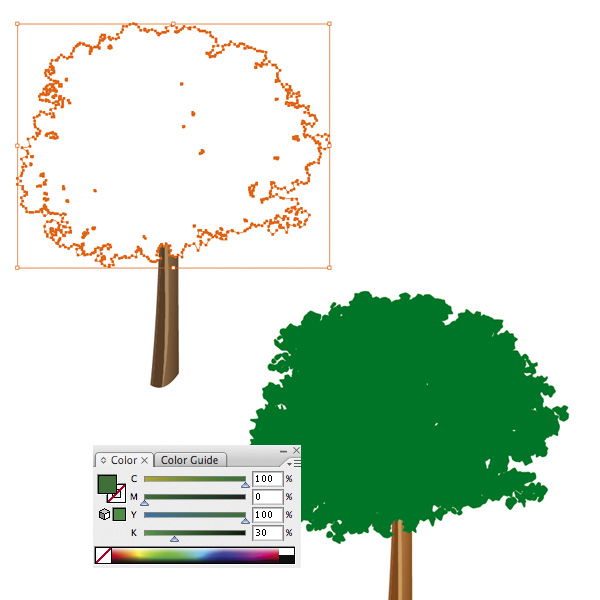
Step 15
The way to reveal back the disappear objects is just simply by adding the color that work with the Overlay mode in the background, in this case it would be green. So I need to have the green exactly have the same shape as the shady leave. Select the shady leave Copy and Pate it in Front (Ctrl + F) and apply Add to Shape Area in Pathfinder palette, click the Expand button when it's done. Now we have a shape that exactly has the same outline as the shady leave. Fill it with dark green then put it right below the leaves, cut it (Ctrl + X), select the leaves then press Ctrl + B to place the duplicate right below.

Step 16
Now that the problem is solved we can now play with the background without worrying the disappear leaves.

Finish
Apply the same technique to the other tree, feel free to experiment with different colors. ^_^

| AI Vector File |
Comments are closed.
Comments have been close for this post.